When it comes to refreshing the look of your home, few things have as much impact as a fresh coat of paint. Not only can painting transform the aesthetic of your space, but it also adds value to your home. To help you achieve the best results, we’ve compiled a comprehensive guide to the best interior painting tips. From choosing the right colors to mastering the techniques, these tips will help you paint like a pro.
1. Start with a Clear Vision and Plan
Before you even pick up a paintbrush, it’s crucial to have a clear vision of what you want to achieve. Consider the purpose of each room and how the color will influence the mood. For instance, lighter shades are excellent for making a space feel more open and airy, while darker tones can create a cozy, intimate atmosphere. Make sure to sample several colors by applying small patches on your walls to see how they look in different lighting conditions throughout the day.
Color Selection Tips:
- Neutral colors like whites, beiges, and grays are versatile and timeless.
- Bold colors can create a focal point and add personality but may require more careful planning.
- Complementary colors should be chosen to ensure the room’s overall harmony.
2. Choose High-Quality Paint and Materials
Investing in high-quality paint and materials can make a significant difference in the outcome of your project. Premium paints offer better coverage, last longer, and provide a more uniform finish. When selecting your supplies, don’t skimp on brushes and rollers. A high-quality brush and roller will provide a smoother application, reducing the number of coats needed and preventing unsightly brush strokes.
Key Materials You Need:
- High-quality paint suited for the specific room (e.g., moisture-resistant paint for bathrooms).
- Good brushes and rollers with appropriate bristle type and nap length for the surface being painted.
- Painter’s tape to protect trim and ceilings and ensure clean lines.
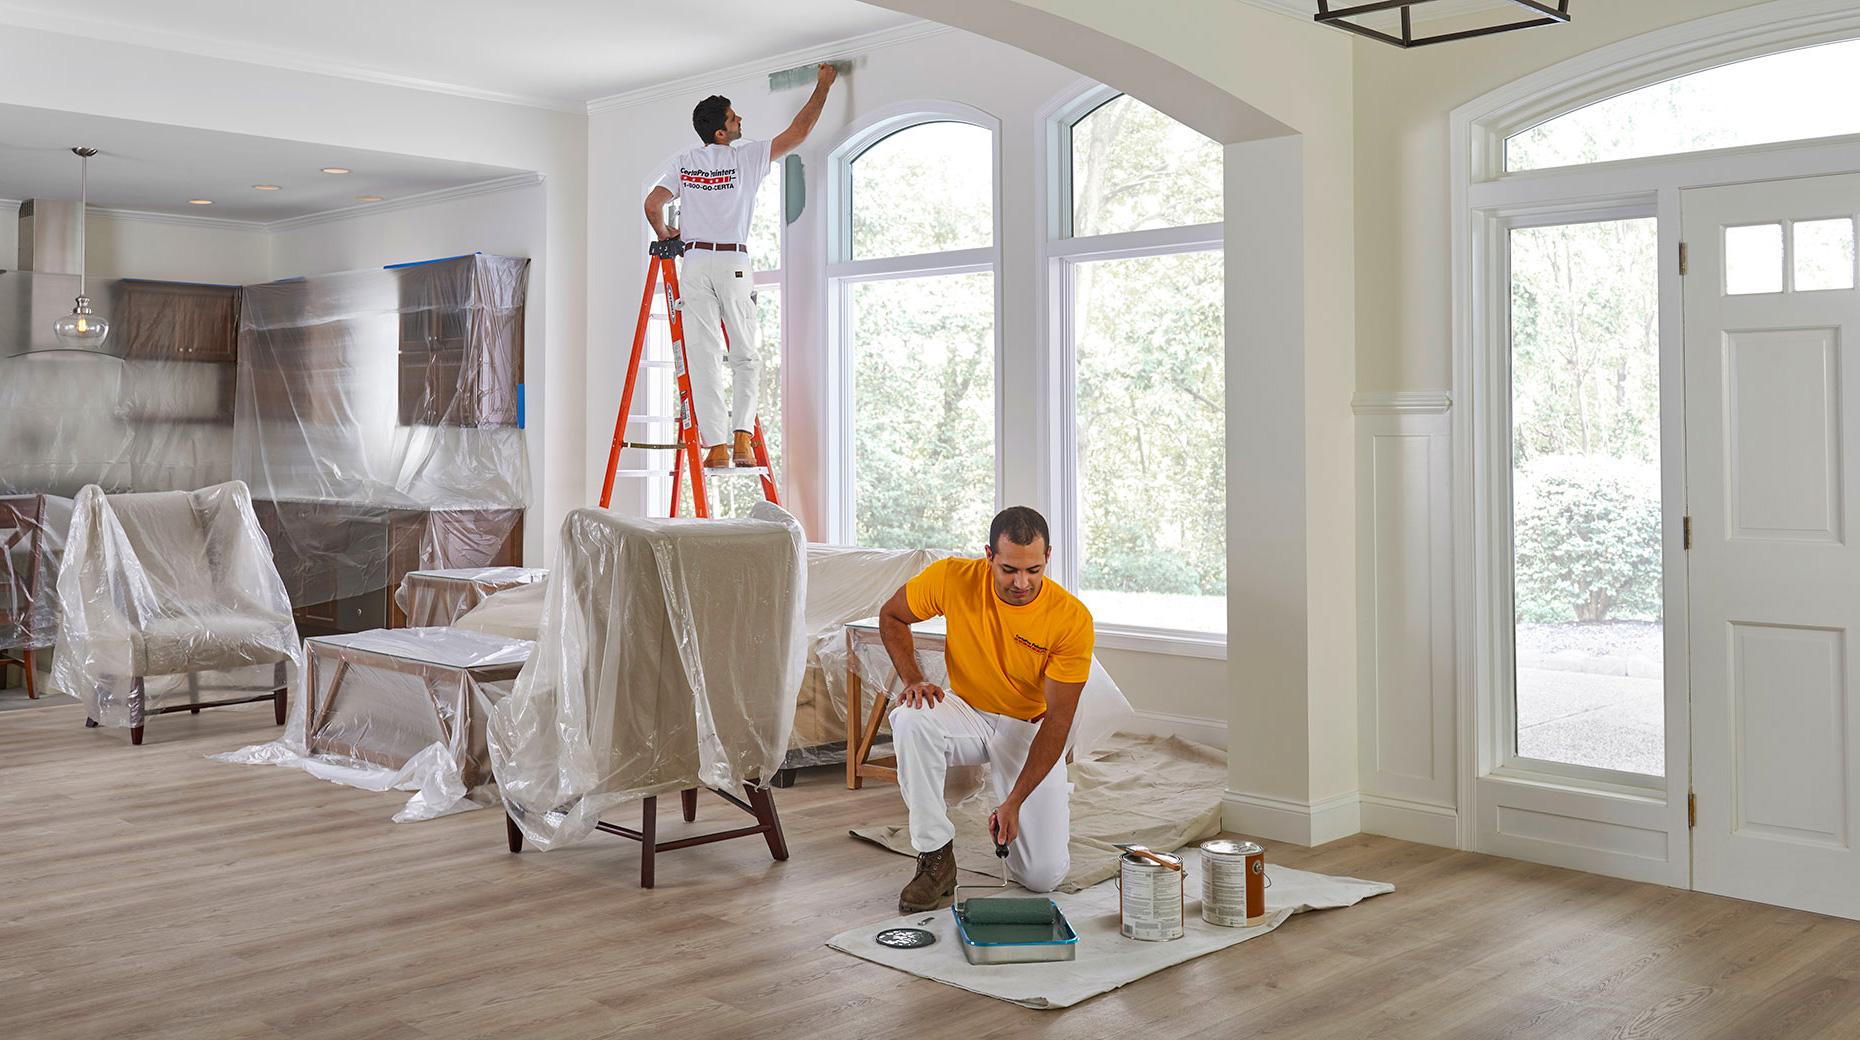
3. Prepare Your Space Properly
Preparation is key to a successful paint job. Proper preparation not only ensures a smooth and professional finish but also extends the life of your paint. Start by moving furniture out of the room or covering it with drop cloths. Remove switch plates, outlet covers, and any wall decorations. Clean the walls to remove dust, dirt, and grease that can prevent the paint from adhering properly.
Steps to Prepare Your Room:
- Clear the room of furniture or cover it with drop cloths.
- Clean the walls with a mild detergent to remove dirt and grease.
- Repair any damage such as holes, cracks, or peeling paint. Use spackle for small holes and a patching compound for larger ones.
- Sand the walls lightly to create a smooth surface for the paint to adhere to. This is especially important if you’re painting over a glossy finish.
- Apply painter’s tape to trim, windows, and doors to ensure clean lines.
4. Use the Right Painting Techniques
Mastering the right painting techniques is crucial for achieving a professional finish. Start with a good primer, especially if you’re painting over a darker color or a new wall. Primer helps the paint adhere better and ensures a more vibrant and even color. When you’re ready to paint, use a “W” or “M” motion to distribute the paint evenly and avoid streaks.
Pro Painting Techniques:
- Cut in first: Use a brush to paint a 2-3 inch band around the edges of the walls, including corners and along the trim. This technique is called “cutting in” and helps create a clean edge.
- Roll on the paint: After cutting in, use a roller to fill in the rest of the wall. Load the roller with paint, but avoid overloading to prevent drips and uneven coverage.
- Maintain a wet edge: To avoid lap marks, always maintain a wet edge, meaning you should overlap the areas you’ve just painted while they are still wet.
5. Allow for Proper Drying Time
One of the most common mistakes in painting is not allowing sufficient drying time between coats. Follow the manufacturer’s instructions for drying times, and remember that factors like humidity and temperature can affect how quickly paint dries. Rushing this step can lead to imperfections and uneven color.
Drying Time Tips:
- Ventilate the room properly by opening windows and using fans to speed up drying.
- Avoid heavy coats of paint. Several thin layers are better than one thick coat for achieving a smooth finish.
- Patience is key: Wait at least 24 hours before applying a second coat, especially in humid conditions.
6. Protect Your Finished Work
Once your walls are beautifully painted, it’s important to protect your hard work. Clean your brushes and rollers immediately after use to extend their life for future projects. Carefully remove the painter’s tape before the paint fully dries to avoid peeling. Finally, consider applying a protective finish if you’re painting high-traffic areas.
Maintenance Tips:
- Avoid washing newly painted walls for at least two weeks to allow the paint to cure fully.
- Use gentle cleaning solutions when it’s time to clean. Harsh chemicals can damage the paint’s finish.
- Touch up small scuffs and chips promptly to maintain a fresh look.
7. Consider Professional Help for Large Projects
While DIY painting can be a fun and rewarding project, there are times when hiring a professional can save you time and stress. Large rooms with high ceilings, intricate trim work, or complicated color schemes may benefit from a professional touch. Experienced painters have the tools and expertise to complete the job efficiently and to a high standard.
Benefits of Hiring a Professional:
- Expert color consultation to ensure the best choice for your space.
- High-quality finish with fewer mistakes and touch-ups needed.
- Time savings, especially for large or complex projects.
By following these interior painting tips, you can achieve a professional-looking finish that enhances your home’s beauty and value. Whether you’re tackling a small room or a whole house, these strategies will help you get the best results.